26 Apr 2020
This is an older article I did on how I make the bases for my miniatures - not all need a base like this - but most do. The end result is attractive, stable and pretty durable.
1. Base the Mini
This step is pretty obvious - attach the miniature to the base that you want to use. If it came with a plastic circular or square base, just glue it in. I actually like to use epoxy putty to fill in any gaps in the base - it also helps if the little tab on the bottom of the miniature is too thin for the slot in the base, which can make the miniature wobble.
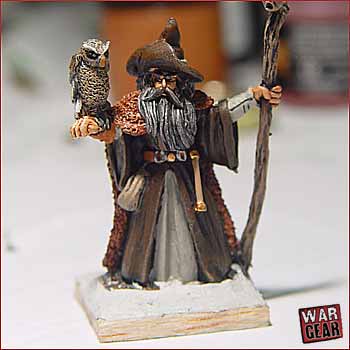
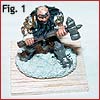 If the mini doesn't have a plastic base (like Reaper Dark Heaven minis) I usually glue them to a 1" square balsa base (fig 1). This makes them more stable as well as making them fit well into formations for wargames. I know balsa is not the sturdiest material, but it's cheap and easy to work with. When you add the epoxy putty and sand in later steps the base becomes quite sturdy. If the mini doesn't have a plastic base (like Reaper Dark Heaven minis) I usually glue them to a 1" square balsa base (fig 1). This makes them more stable as well as making them fit well into formations for wargames. I know balsa is not the sturdiest material, but it's cheap and easy to work with. When you add the epoxy putty and sand in later steps the base becomes quite sturdy.
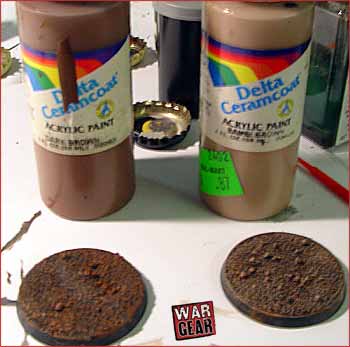
 For the minis with a metal base like in Fig. 1, I then use epoxy putty to build up the base, so there isn't an abrupt drop from the metal to the wood. You can use the blue and white epoxy putty that GW sells if you like, or I just get epoxy putty from Ace Hardware - it's in the section where all their glue and stuff is. It's about $3 for a pretty good amount, and comes in a little tube. It's a little harder to work with than the GW variant, but much cheaper. The most important thing is to use small amounts and keep your hands wet while you smooth it or it will keep sticking to your fingers. If you have any bits sticking out, you can trim them off with a sharp knife after it's hardened. For the minis with a metal base like in Fig. 1, I then use epoxy putty to build up the base, so there isn't an abrupt drop from the metal to the wood. You can use the blue and white epoxy putty that GW sells if you like, or I just get epoxy putty from Ace Hardware - it's in the section where all their glue and stuff is. It's about $3 for a pretty good amount, and comes in a little tube. It's a little harder to work with than the GW variant, but much cheaper. The most important thing is to use small amounts and keep your hands wet while you smooth it or it will keep sticking to your fingers. If you have any bits sticking out, you can trim them off with a sharp knife after it's hardened.
|
|
2. Apply the Sand
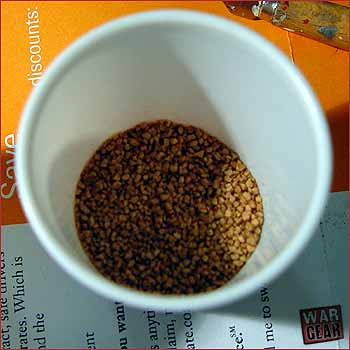
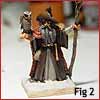
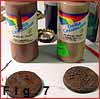
 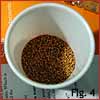 Next, I give the bases some texture, using sand (fig. 3) - you can get the sand at garden stores. You want to make sure it's pretty fine. I got a big bag of it for $3. I use it in small amounts in small plastic cups (which minimizes my chances of spilling the whole bag - always good around me!) I also like to add in some larger grained "pebbles" which are actually "lizard litter" (fig. 4) aquarium ground cover that I got at a pet store. These add variety to the texture of the base which is always nice. Next, I give the bases some texture, using sand (fig. 3) - you can get the sand at garden stores. You want to make sure it's pretty fine. I got a big bag of it for $3. I use it in small amounts in small plastic cups (which minimizes my chances of spilling the whole bag - always good around me!) I also like to add in some larger grained "pebbles" which are actually "lizard litter" (fig. 4) aquarium ground cover that I got at a pet store. These add variety to the texture of the base which is always nice.
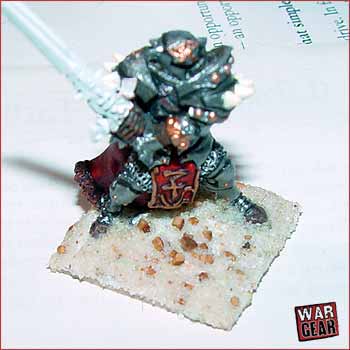
 To apply the sand, I make a fairly thick mixture of white (PVA) glue and water - you want it to be pretty thick. Spread the mix on the base (careful not to get any on the miniature it self, unless you want dirt stuck to it!). Then just sprinkly it on! If you're using the pebbles, I like to "dash" a pinch of that on, then sprinkle on the sand. Tap off any extra and set it aside to dry. Make sure it's real dry before proceeding. To apply the sand, I make a fairly thick mixture of white (PVA) glue and water - you want it to be pretty thick. Spread the mix on the base (careful not to get any on the miniature it self, unless you want dirt stuck to it!). Then just sprinkly it on! If you're using the pebbles, I like to "dash" a pinch of that on, then sprinkle on the sand. Tap off any extra and set it aside to dry. Make sure it's real dry before proceeding.
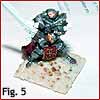
Once your sure this first coat is dry, give it a second coat of more watered down white glue. This fixes the sand in place. Once again, set it aside and make sure it's really dry before the next step. At this point, the base should look something like Figure 5.
|
|
3. Apply the base coat
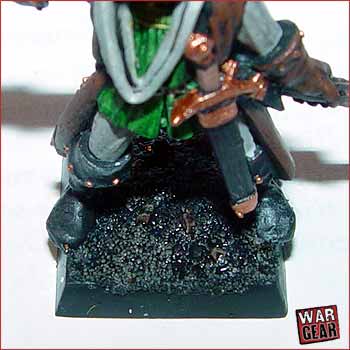
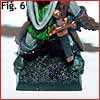 Next, apply the base coat. I generally use black or dark brown. You want to water it down, but not so much that the color of the sand shows through (Fig. 6). Next, apply the base coat. I generally use black or dark brown. You want to water it down, but not so much that the color of the sand shows through (Fig. 6).
|
|
 4. Drybrush 4. Drybrush
Now, drybrush the base - being careful not to get the feet of the miniature. I generally start with a dark brown (but lighter than the base coat), followed by a light brown.
|
|
5. Apply the details
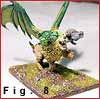 Finally, detail the base you desire. I usually use one or two shades of grey and paint all the little "pebbles", and the apply some patchy static grass (which is really handy to cover any areas that didn't get sand or other problems like that.) Finally, detail the base you desire. I usually use one or two shades of grey and paint all the little "pebbles", and the apply some patchy static grass (which is really handy to cover any areas that didn't get sand or other problems like that.)
|
That's all! They're not the fanciest bases out there, but you can spruce them up by adding some other items (small rocks, skulls, lichen, etc) to them. Best of all they're cheap to do, reasonably quick, and quite tough.