I imagine these aren't a revelation to anyone, but maybe this will be helpful for someone out there. I know when I first got started in the hobby I was looking for an easy, cheap way to store miniatures. This article shows you how to make pretty decent storage boxes on the cheap. They're not nearly as nice as those Chessex storage boxes you see at cons, but a lot cheaper...
Materials
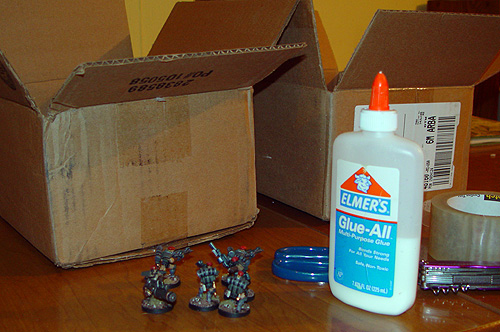 For this project you won't need anything particularly difficult to find. In fact these are probably supplies that anyone into minis and terrain will have lying around. The most important part is a couple boxes. One will be the outer shell and won't be modified much, the other will be cut up for parts. You'll probably want to cut up the box that's not in as good of shape. I'm using two amazon shipping boxes here - it's a lot easier if you use two boxes that are the same size
You'll also need scissors, a sharp knife, some packing tape and glue.
Buiding a Strong Base
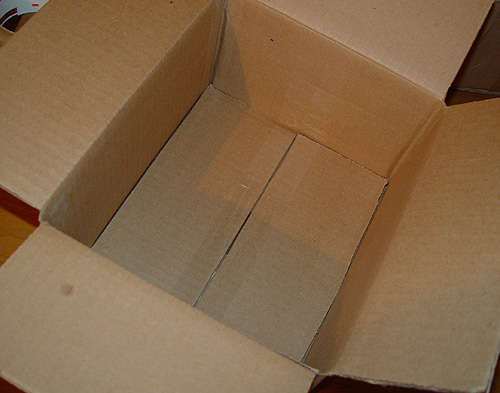 The first thing to do is reinforce the first box (the one you're not going to cut up) with packing tape if seems like it will need it. After that, we need to strengthen the inside base - what the minis will be resting on. This is important both to make sure that the "floor" is strong enough to bear the weight of the miniatures, as well as to give you a flat surface to place them on. To do this, just cut the longer flaps from the second box - glue the bottoms and place them on the bottom of the box, then tape up the seam. This gives you a nice flat, refinforced "floor."
Dividers are for Dividin'
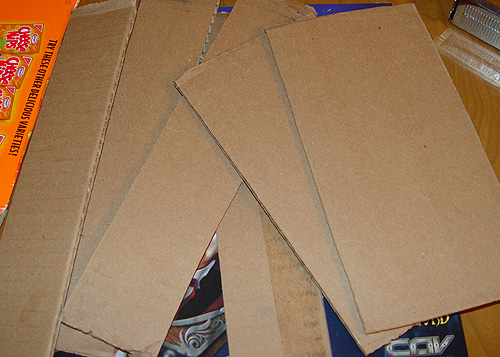 Ok, the next step is to create the dividers. You'll use these to make a "grid" of compartments to keep the miniatures apart so they don't bang into each other and mess up their paint jobs. To do this, cut the other flaps from the bottom of the second box - you should end up with two "long" pieces and two "short" pieces. Then you'll need to cut each in half down the long axis of the cardboard. This is where a straight edge and a sharp razor knife are handy. Be careful!
Notches
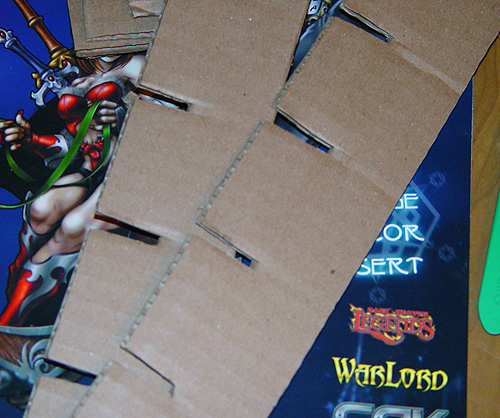 Now we'll create notches in each of the dividers. You need to decide what size of compartments you want to make. I've found that cutting a notch every two inches works quite well for individually based 25-28mm scale miniatures. Just measure every two inches on the long axis of each piece, and put a mark. Then use scissors to cut a notch in the cardboard. Try to make the notch as close to the width of the cardboard as possible - this is important to ensure a tight fit. Also try to cut them the same distance into the cardboard. I'd also cut the notches in straightest side of each piece, if there's some difference.
Assemble!
 Once you have all the parts, it's time for assembly. This will vary a little depending on the how you cut the notches. In my case there were three long dividers and four short dividers. I just placed the three longer ones in, with the notches facing up, and the matched up a short divider and pushed it down on the bottom dividers. You may need to rotate the dividers - depending on the distance between notches you may have a slightly longer edge on one side of the other.
Once they're all in, it should be pretty sturdy - you can place your minis one in each compartment, and they'll be safely stored!
Conclusion
These boxes are cheap and fast to make- it too me about 40 minutes to make one - and that includes time taken for pictures, etc. They don't work qutie as well if you need something to transport miniatures around in, but as a way to just store large numbers of minis, they're pretty handy. If you are going to be transporting them in these boxes, you may want to place something over the top of the dividers to keep the miniatures from coming out of their compartments. YOu could even make a "second story" of cardboard and put more dividers on top of the "bottom floor" of the box - this won't work if you have figures with banners or spears that stick above the dividers though.
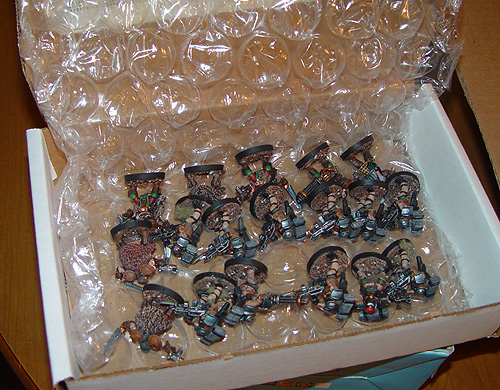 Incidentally, if you have some bubble wrap packing material and an appropriate sized box, you can make an even faster box by just lining it with packing wrap. If you try to keep some room between the miniatures when you place them on the packing material, and be careful with how you handle the box, you can minimize the chance of minatures bumping into each other.
And if you're looking to buy something for storing miniatures, these work quite nicely for transporting small numbers of miniatures. Alternatively, the "Barracks Miniatures Box " look like they might work well.